Guide
Pour Over Coffee Guide 2026
By James Wu, Home Barista & Coffee Expert · Updated 2026-03-11
Pour over coffee is a manual brewing method where you slowly pour hot water over ground coffee in a filter-equipped dripper, allowing gravity to pull the water through the grounds and into your cup. It produces a clean, bright, and nuanced cup that highlights the origin flavors of the beans better than most automatic drip machines. A standard single-cup pour over uses 15-18 grams of medium-fine ground coffee with 250-300 ml of water heated to 200-205 degrees Fahrenheit, and the entire brew takes roughly 3 to 4 minutes from first pour to last drip.
Whether you are switching from a French press, upgrading from an automatic drip machine, or simply curious about what all the fuss is about, this guide covers everything you need to know to start brewing exceptional pour over coffee at home in 2026.
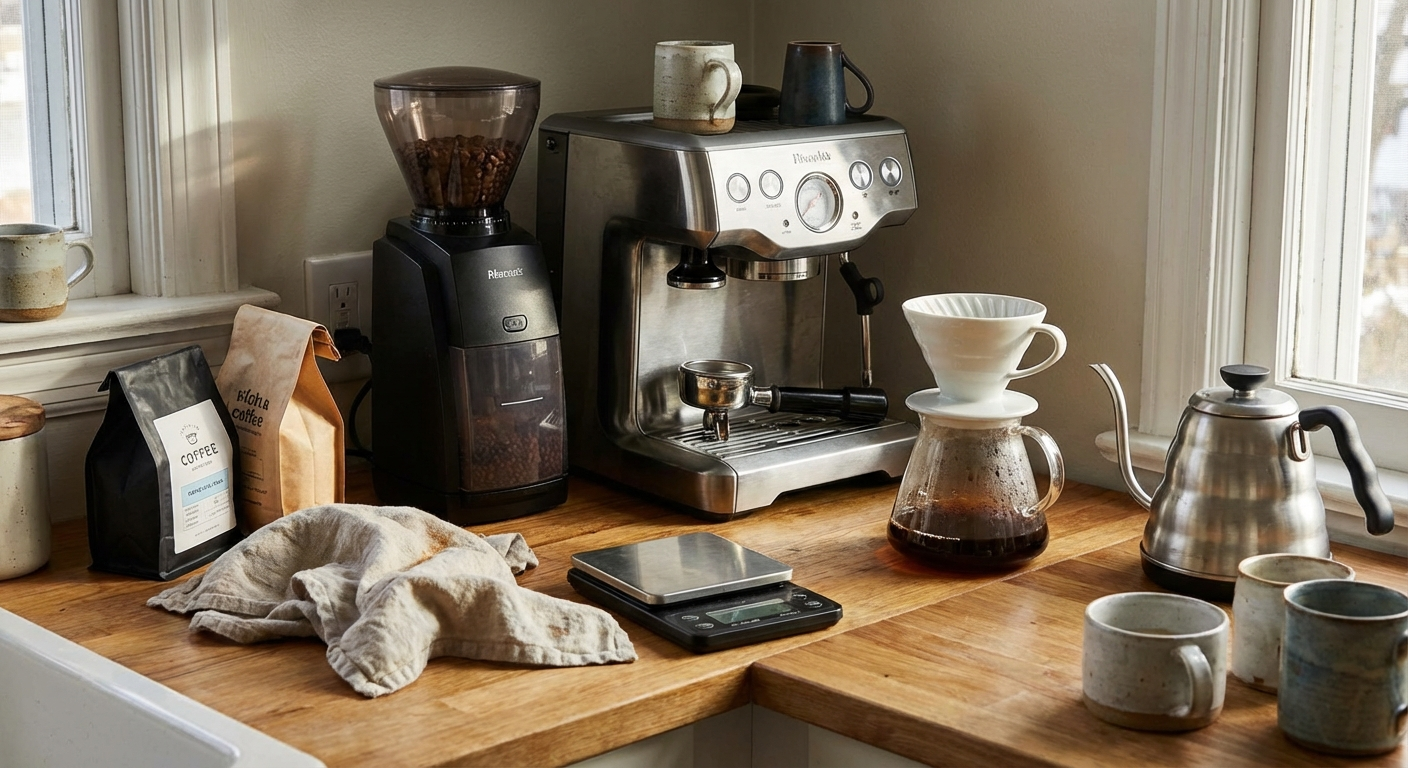
Table of Contents
- Why Pour Over Is Worth the Effort
- Essential Pour Over Equipment
- Brew Ratio Table
- Step-by-Step Pour Over Technique
- Top 5 Pour Over Drippers Compared
- Best Pour Over Starter Kits for 2026
- Common Pour Over Mistakes and How to Fix Them
- Frequently Asked Questions
- Sources
What Is Pour Over Coffee?
Pour over coffee is one of the oldest and most straightforward manual brewing techniques. The concept is simple: place a paper or metal filter in a cone-shaped dripper, add ground coffee, and pour heated water over the grounds in a slow, controlled stream. Gravity does the rest, drawing the water through the coffee bed and into your mug or carafe below.
The method dates back to 1908, when Melitta Bentz, a German housewife, punched holes in a brass pot and lined it with blotting paper from her son's school notebook. That invention laid the groundwork for nearly every drip coffee method used today. Over the past decade, specialty coffee shops and home baristas alike have embraced pour over brewing for its ability to produce a remarkably clean and flavorful cup.
Unlike immersion methods such as French press, where the coffee grounds sit submerged in water for the entire brew time, pour over is a percolation method. Water passes through the coffee bed continuously, extracting soluble flavors along the way. This percolation process tends to produce a cup with more clarity, brighter acidity, and less body compared to immersion brewing. For single-origin coffees with complex flavor profiles, pour over is often the preferred method among specialty coffee professionals.
Why Pour Over Is Worth the Effort
You might be asking why you should bother with a manual brew method when perfectly decent automatic coffee makers exist. Here are the key reasons pour over enthusiasts swear by the technique:
Total Control Over Every Variable
With pour over, you control the water temperature, pour rate, agitation, and brew time. Automatic machines lock you into fixed settings. That control lets you dial in your recipe to match the specific beans you are using, which matters far more than most people realize.
Cleaner, More Nuanced Flavor
The paper filter removes oils and fine sediment that other methods leave behind. The result is a cup with remarkable clarity where individual tasting notes stand out. If the bag says "notes of blueberry, milk chocolate, and jasmine," you are far more likely to taste those distinct flavors in a pour over than in a French press or moka pot.
Low Cost of Entry
A quality dripper costs between fifteen and forty dollars. Add a basic gooseneck kettle and a kitchen scale, and your total investment is well under one hundred dollars. Compare that to a high-end automatic brewer, which can run three hundred dollars or more.
Ritual and Mindfulness
There is something genuinely calming about the pour over process. The three or four minutes of focused, intentional brewing can serve as a small daily ritual that forces you to slow down before the day picks up speed.
Essential Pour Over Equipment
Getting started with pour over coffee requires a handful of key pieces of equipment. Below is a breakdown of each category, what to look for, and what you can expect to spend.
Drippers
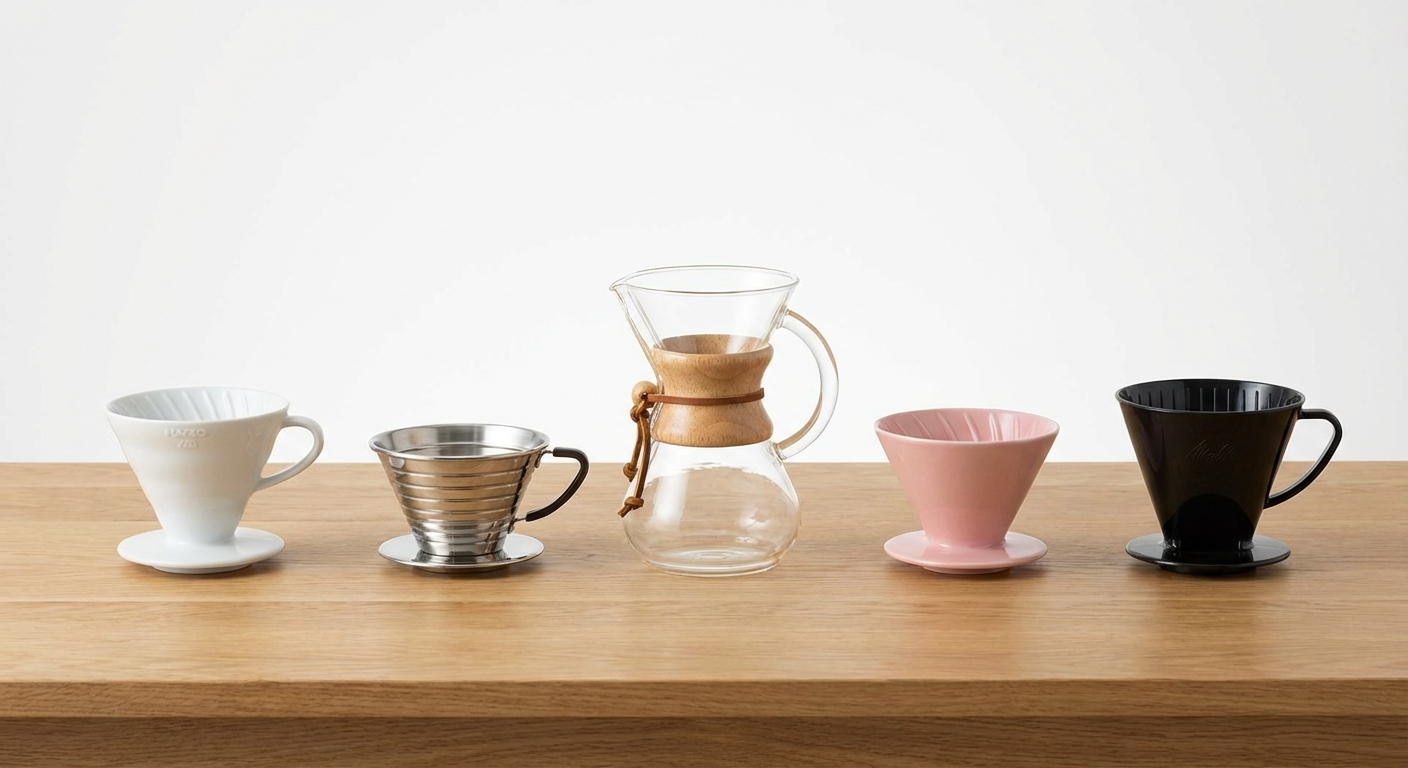
The dripper is the cone or wedge that holds the filter and coffee grounds. It sits on top of your mug or carafe. Drippers come in several materials including ceramic, glass, plastic, and stainless steel. The shape of the dripper, the size and number of drain holes, and the internal rib pattern all influence flow rate and extraction.
Popular options include the Hario V60, Kalita Wave, Chemex, Melitta, and Origami dripper. Each has a different design philosophy, and we compare the top five in detail further down in this guide.
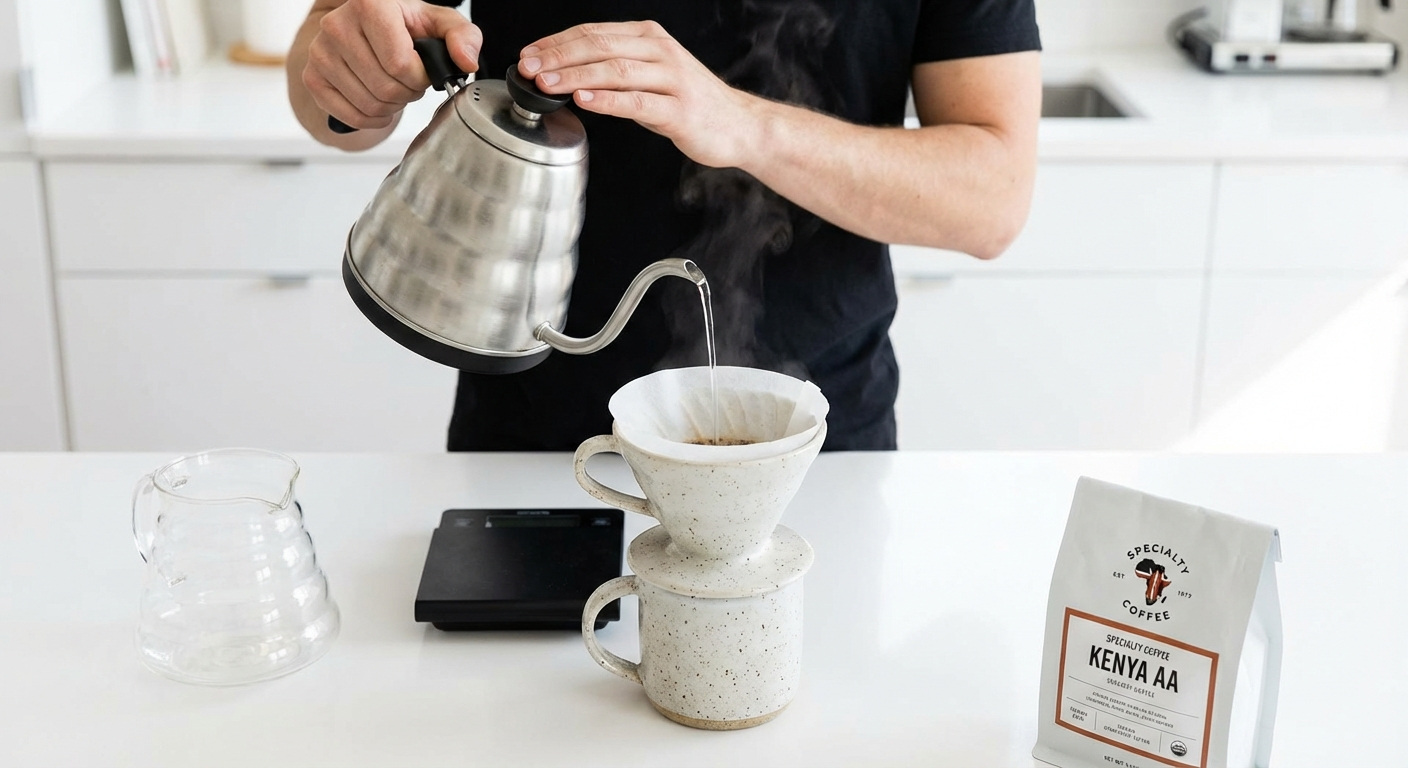
Gooseneck Kettles
A gooseneck kettle is not technically required, but it is strongly recommended. The narrow, curved spout gives you precise control over where the water lands and how fast it flows. Without a gooseneck, it is very difficult to pour slowly and evenly enough to get consistent extraction across the entire coffee bed.
Electric gooseneck kettles with built-in temperature control have become the standard for serious home brewers. Models from Fellow, Hario, and Bonavita allow you to set a target temperature to the degree and hold it there while you brew.
Recommended: Fellow Stagg EKG Electric Kettle Check Price on Amazon
Scales
A digital scale with at least 0.1-gram precision is essential. Coffee brewing is a ratio-based process, and eyeballing your measurements introduces too much variability. A good coffee scale also includes a built-in timer, so you can track your pour phases without needing a separate device.
Recommended: Timemore Black Mirror Basic+ Coffee Scale Check Price on Amazon
Filters
Always use the filters designed for your specific dripper. Hario V60 filters are not interchangeable with Kalita Wave filters, and using the wrong size or shape will cause channeling and uneven extraction. For paper filters, many baristas recommend rinsing the filter with hot water before adding coffee. This removes any papery taste and preheats the dripper.
Some drippers also support reusable metal or cloth filters. Metal filters allow more oils to pass through, producing a cup with more body but less clarity. Cloth filters sit somewhere in between paper and metal in terms of filtration.
Grinder
While we could write an entire article about grinders alone, the short version is this: a quality burr grinder matters more than almost any other variable in your brew. Blade grinders produce uneven particle sizes, which leads to both over-extraction of fine particles and under-extraction of large ones in the same cup. A decent entry-level burr grinder like the Baratza Encore or the Timemore C2 will transform your pour over results overnight.
Recommended: Baratza Encore ESP Burr Grinder Check Price on Amazon
Brew Ratio Table
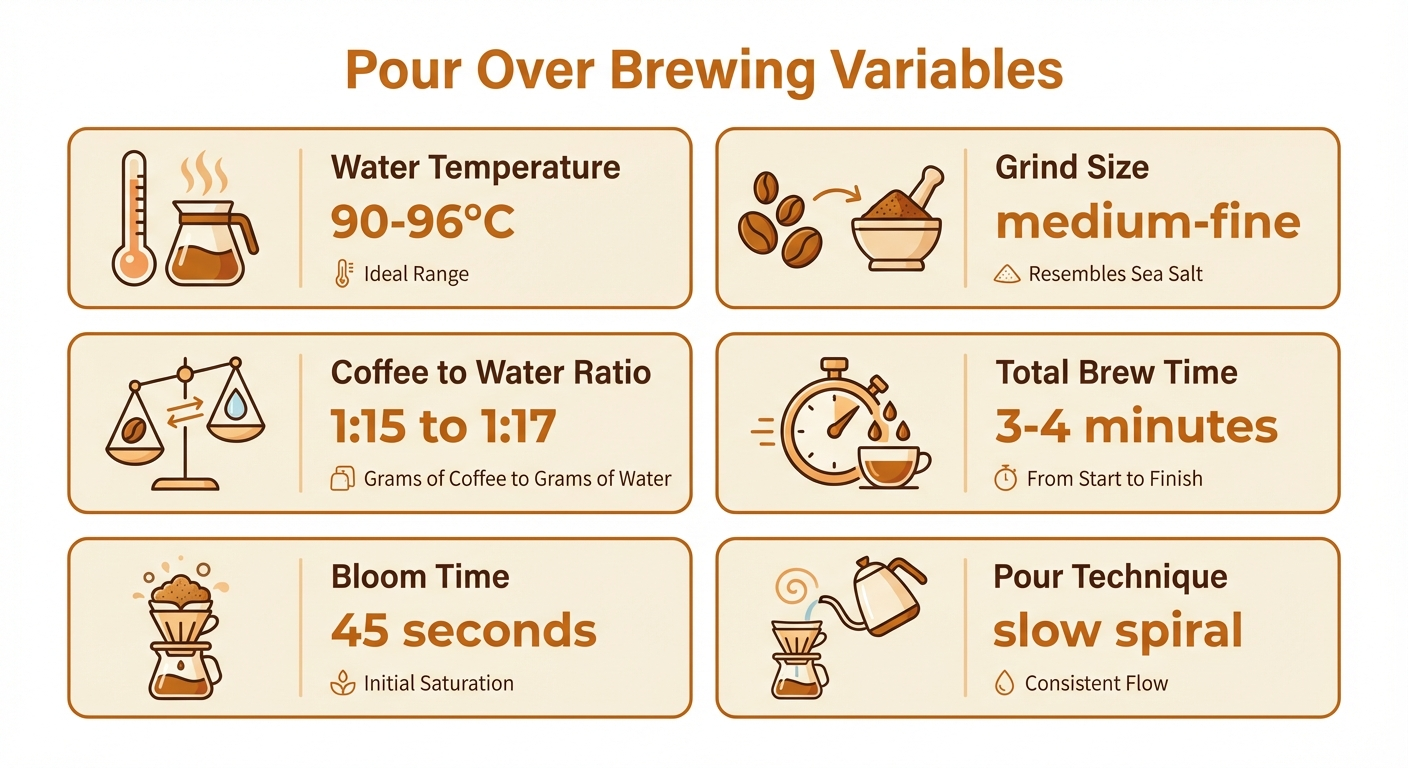
Getting the ratio of coffee to water right is the foundation of a good pour over. The table below provides starting points for different cup sizes based on the widely recommended ratio of 1:16 (one gram of coffee for every sixteen grams of water). Adjust to taste: a stronger cup might use 1:15, and a lighter cup 1:17.
| Cup Count | Coffee Dose (grams) | Water Amount (ml) | Approximate Brew Time |
|---|---|---|---|
| 1 cup | 15 g | 250 ml | 2:30 - 3:00 |
| 2 cups | 25 g | 400 ml | 3:00 - 3:30 |
| 3 cups | 36 g | 580 ml | 3:30 - 4:00 |
| 4 cups | 48 g | 768 ml | 4:00 - 4:30 |
| 6 cups | 64 g | 1020 ml | 5:00 - 6:00 |
A few notes on this table. First, "cup" here refers to roughly 250 ml of brewed coffee, not a standard measuring cup. Second, brew time naturally increases with larger batches because there is more coffee for the water to pass through. If your brew finishes much faster than the times listed, your grind is likely too coarse. If it runs much longer, your grind is too fine.
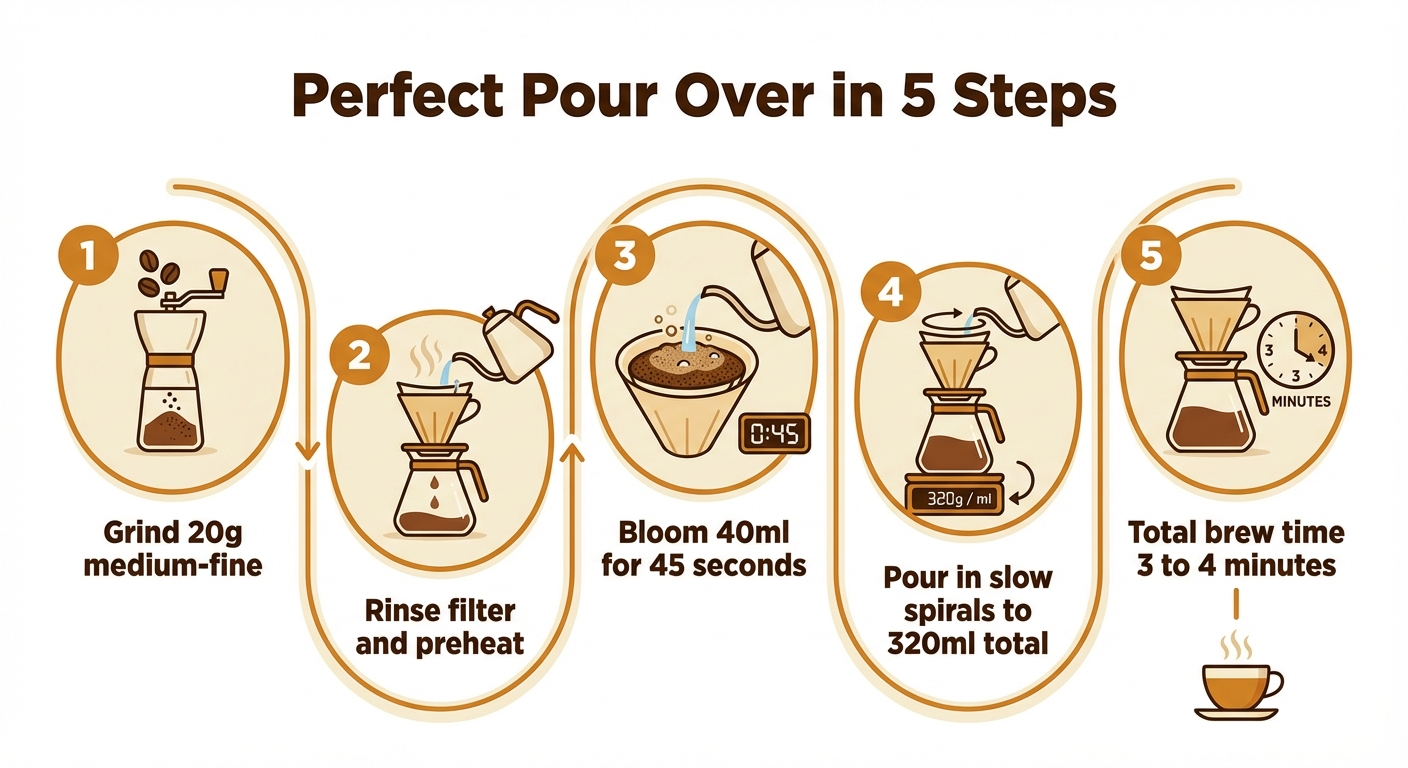
Step-by-Step Pour Over Technique
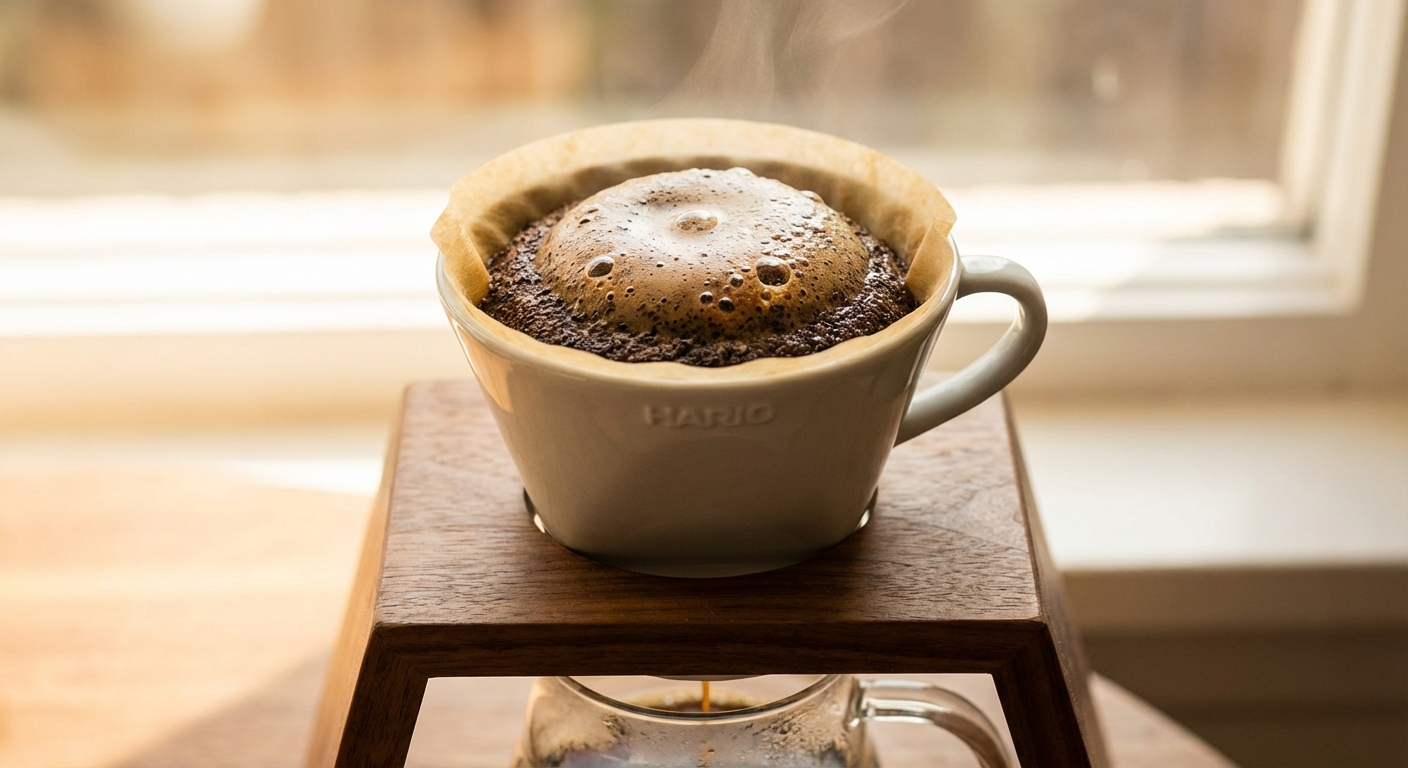
Follow these steps for a reliable, repeatable pour over brew. This guide uses a single-cup recipe with the Hario V60, but the fundamentals apply to any conical dripper.
Step 1: Heat Your Water
Bring your water to 200-205 degrees Fahrenheit (93-96 degrees Celsius). If you do not have a temperature-controlled kettle, bring the water to a full boil and then let it rest for 30 to 45 seconds. Water that is too hot will over-extract and produce bitterness. Water that is too cool will under-extract and taste sour or thin.
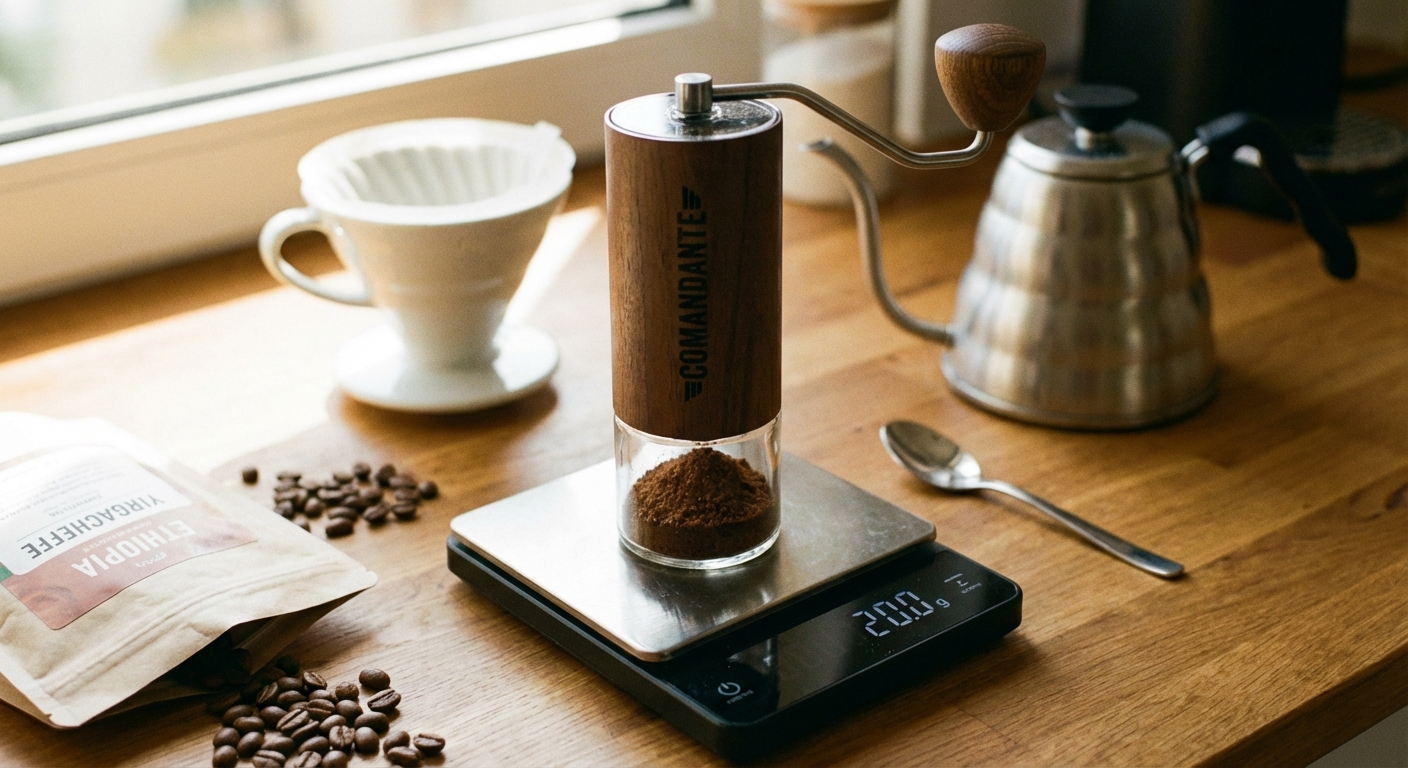
Step 2: Grind Your Coffee
Weigh out 15 grams of whole bean coffee. Grind to a medium-fine consistency, roughly the texture of table salt. The grind size is your primary tool for controlling brew time and extraction. Write down your grinder setting so you can adjust in future brews.
Step 3: Prepare the Filter and Dripper
Place the paper filter in your dripper and set the dripper on your mug or carafe. Pour hot water over the entire filter to rinse it and preheat the vessel below. Discard the rinse water before proceeding.
Step 4: Add Coffee and Level the Bed
Pour the ground coffee into the rinsed filter. Give the dripper a gentle shake or tap to settle the grounds into an even, flat bed. An uneven bed causes water to find the path of least resistance, leading to channeling and uneven extraction.
Step 5: The Bloom (0:00 - 0:45)
Place the dripper and mug on your scale. Tare the scale to zero. Start your timer and pour approximately 30-45 grams of water in a slow spiral, starting from the center and moving outward. The goal is to saturate all the grounds evenly. You will see the coffee bed rise and bubble as trapped carbon dioxide escapes. This is called the bloom, and it is a sign of fresh coffee. Let the bloom sit for 30 to 45 seconds.
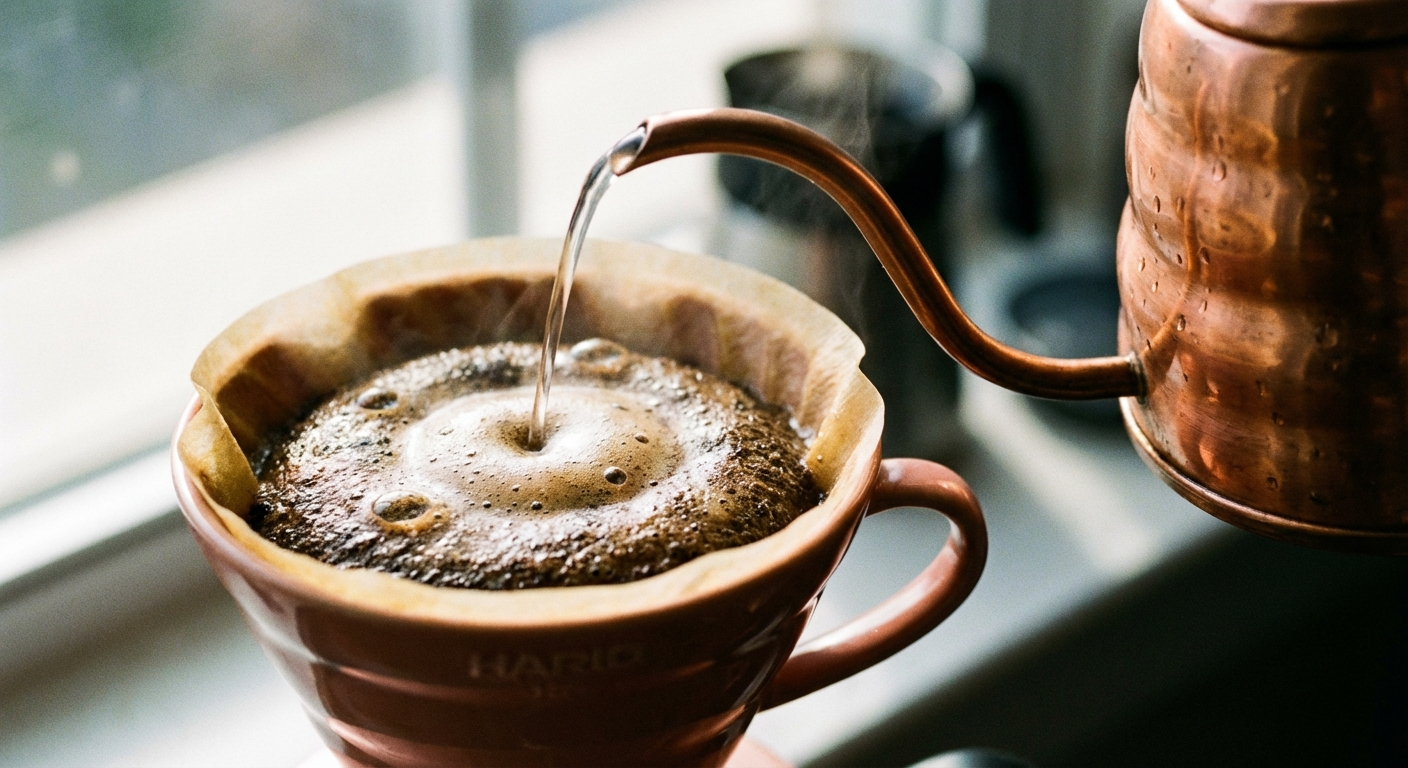
Step 6: The Main Pour (0:45 - 2:00)
After the bloom, begin pouring in slow, steady concentric circles. Pour from the center outward to about a centimeter from the edge of the filter, then spiral back to the center. Keep the water level relatively consistent in the dripper, never letting the bed dry out completely and never flooding it above the top of the grounds. Pour in pulses if you prefer, adding 50-70 grams of water at a time with brief pauses between each pour.
Step 7: The Final Drawdown (2:00 - 3:00)
Once you have poured your target volume of water (250 ml total for a single cup), stop pouring and let the remaining water drain through the coffee bed. The total brew time from the first pour to the last drip should land between 2:30 and 3:00 for a single cup.
Step 8: Evaluate and Adjust
Taste your coffee. If it is bitter or harsh, your grind may be too fine or your water too hot. If it is sour, thin, or tea-like, your grind may be too coarse or your water too cool. Make one adjustment at a time and keep notes. Within a few brews, you will find your sweet spot.
Top 5 Pour Over Drippers Compared
Choosing a dripper is the most important equipment decision you will make. Here are the five most popular options for 2026, along with their strengths and weaknesses.
1. Hario V60
The Hario V60 is the industry standard for specialty pour over. Its large single drain hole and spiral internal ribs give the brewer maximum control over flow rate and extraction. Available in ceramic, glass, plastic, copper, and stainless steel.
Pros:
- Maximum control over brew variables
- Widely available and inexpensive (plastic version under ten dollars)
- Huge community of recipes and guides available online
- Filters are easy to find and affordable
Cons:
- Least forgiving of technique errors among popular drippers
- Requires a gooseneck kettle for best results
- Inconsistent pours produce inconsistent cups
2. Kalita Wave 185
The Kalita Wave uses a flat-bottom design with three small drain holes. This restricts flow rate and makes extraction more even and forgiving, regardless of pour technique. The proprietary wave-style filters keep the coffee bed insulated from the walls of the dripper.
Pros:
- Very forgiving and consistent, even with imperfect technique
- Flat bed promotes even extraction
- Great for beginners transitioning from automatic drip
Cons:
- Less control compared to the V60
- Proprietary filters are more expensive and harder to find
- Can clog if the grind is too fine
3. Chemex Classic
The Chemex is both a dripper and a carafe in one elegant, hourglass-shaped glass vessel. It uses extra-thick proprietary filters that remove more oils and sediment than standard pour over filters, producing an exceptionally clean and light cup.
Pros:
- Beautiful design that doubles as a serving carafe
- Produces the cleanest cup of any common pour over method
- Available in multiple sizes from three to ten cups
- Iconic mid-century design looks great on any counter
Cons:
- Thick filters can mute delicate flavor notes
- Glass is fragile and the wooden collar requires hand washing
- Filters are expensive and not interchangeable with other drippers
- Larger sizes make single-cup brewing awkward
4. Origami Dripper
The Origami dripper is a newer entrant that has quickly gained popularity in competition circles. Its unique folded ceramic design accepts both Hario V60 conical filters and Kalita Wave flat-bottom filters, giving you the flexibility to switch between brewing styles with one dripper.
Pros:
- Compatible with multiple filter types
- Excellent airflow for even extraction
- Available in a wide range of colors
- Lightweight for a ceramic dripper
Cons:
- More expensive than the V60 or Kalita Wave
- Ceramic can chip if dropped
- Requires a separate stand or holder for some setups
5. Melitta Pour Over
The Melitta is the original pour over dripper, and modern versions remain excellent budget-friendly options. The single small drain hole naturally restricts flow rate, making it very forgiving for beginners. Melitta filters are available at virtually every grocery store.
Pros:
- Extremely affordable
- Filters are cheap and available everywhere
- Very forgiving thanks to restricted flow rate
- Simple, no-fuss design
Cons:
- Limited control over brew variables
- Restricted flow can lead to over-extraction with fine grinds
- Less nuanced cup compared to the V60 or Origami
- Fewer sizes and material options
Best Pour Over Starter Kits for 2026
If you want to skip the research and get everything you need in one purchase, these starter kits are solid options for different budgets.
Budget Kit (Under $50)
- Hario V60 Plastic Dripper (size 02)
- Pack of 100 Hario V60 tabbed paper filters
- Any basic kitchen scale with gram precision
- A standard stovetop or electric kettle (you can upgrade to gooseneck later)
This kit gets you brewing for minimal investment. The plastic V60 is actually preferred by many professionals because it retains heat better than ceramic and is nearly indestructible.
Mid-Range Kit ($75-$125)
- Hario V60 Ceramic Dripper or Kalita Wave 185
- Fellow Stagg Pour-Over Kettle (stovetop) or a budget electric gooseneck
- Timemore Black Mirror Nano scale
- Timemore C2 hand grinder
- Pack of 100 matching paper filters
This is the sweet spot for most home brewers. The hand grinder and gooseneck kettle represent the two biggest upgrades from the budget kit, and both will noticeably improve your cup quality.
Premium Kit ($200-$350)
- Origami Dripper with wooden holder
- Fellow Stagg EKG Electric Kettle with temperature hold
- Acaia Pearl or Timemore Black Mirror Basic+ scale
- Baratza Encore ESP electric burr grinder
- Assorted filter packs (V60 and Wave)
- Coffee subscription from a specialty roaster
At this level, you have everything a professional barista would use for pour over service. The electric grinder saves time, the temperature-controlled kettle removes guesswork, and the precision scale tracks weight and time simultaneously.
Common Pour Over Mistakes and How to Fix Them
Even experienced brewers run into problems. Here are the most common pour over mistakes and their solutions.
Using Pre-Ground Coffee
Pre-ground coffee loses a significant amount of its aromatic compounds within minutes of grinding. Always grind fresh, immediately before brewing. If you currently do not own a grinder, that should be your next purchase, ahead of any other upgrade.
Ignoring Water Quality
Coffee is roughly 98 percent water. If your tap water tastes off, your coffee will taste off. Filtered water is the minimum standard. For best results, use water with a total dissolved solids (TDS) reading between 75 and 150 parts per million. Distilled water is too flat and produces under-extracted, lifeless coffee.
Pouring Too Fast or Too Aggressively
A hard, fast pour agitates the coffee bed excessively, creates channels, and leads to uneven extraction. Pour gently and deliberately. The gooseneck kettle exists specifically to make slow, controlled pours easier.
Skipping the Bloom
Fresh coffee releases a substantial amount of CO2 when it first contacts water. If you skip the bloom and start your full pour immediately, that escaping gas creates turbulence and channels in the bed, resulting in uneven extraction. Take the extra thirty seconds. It matters.
Not Tracking Your Variables
If you change your grind size, water temperature, pour rate, and coffee dose all at the same time, you will have no idea which change affected the result. Change one variable at a time, keep notes, and you will converge on your ideal recipe much faster.
Frequently Asked Questions
What is the best coffee-to-water ratio for pour over?
The standard starting ratio is 1:16, meaning one gram of coffee for every sixteen grams of water. For a single cup, that translates to 15 grams of coffee and 250 ml of water. If you prefer a stronger cup, try 1:15. For a lighter cup, try 1:17. The best ratio ultimately depends on your beans, grind size, and personal taste, so use 1:16 as a starting point and adjust from there.
Do I really need a gooseneck kettle for pour over?
You do not strictly need one, but it is the single most impactful equipment upgrade you can make for pour over brewing. A gooseneck spout allows you to control the flow rate and placement of your pour with a level of precision that is impossible with a standard kettle. If you are serious about pour over, a gooseneck kettle should be your first accessory purchase after the dripper itself.
How fine should I grind my coffee for pour over?
For most pour over drippers, aim for a medium-fine grind, roughly the consistency of table salt. If your brew finishes too quickly and tastes sour or thin, grind finer. If it takes too long and tastes bitter or astringent, grind coarser. The Chemex is an exception and generally works better with a medium to medium-coarse grind because its thick filters slow the drawdown considerably.
Can I make iced pour over coffee?
Yes, and it is one of the best ways to make iced coffee at home. The Japanese iced coffee method involves brewing your pour over directly over ice. Use the same coffee dose but reduce the hot water by roughly 40 percent and replace that weight with ice in the carafe. The hot coffee extracts fully and then cools instantly on contact with the ice, preserving bright aromatics that are lost in cold brew methods.
How often should I clean my pour over dripper?
Rinse your dripper with hot water after every use. For ceramic and glass drippers, a deeper cleaning with a mild detergent once a week prevents oil buildup that can turn rancid and taint future brews. For the Chemex, you can use a bottle brush to reach the inside of the lower carafe. Never use abrasive scrubbers on glass or glazed ceramic, as micro-scratches can harbor bacteria and old coffee oils.
Sources
- Rao, Scott. Everything but Espresso: Professional Coffee Brewing Techniques. Scott Rao, 2010.
- Hoffmann, James. The World Atlas of Coffee: From Beans to Brewing. 2nd ed., Mitchell Beazley, 2018.
- Specialty Coffee Association. "SCA Brewing Best Practices." SCA.coffee, 2024. Accessed March 2026.
- Hendon, Christopher H., Leeb Colonna-Dashwood, and Maxwell Colonna-Dashwood. "The Role of Dissolved Cations in Coffee Extraction." Journal of Agricultural and Food Chemistry, vol. 62, no. 21, 2014, pp. 4947-4950.
- Hoffmann, James. "The Ultimate V60 Technique." YouTube, 2020. Accessed March 2026.
- Barista Hustle. "Percolation Brewing Guide." Baristahustle.com, 2023. Accessed March 2026.
- Fellow Products. "Stagg EKG Kettle Specifications and Brew Guides." Fellowproducts.com, 2025. Accessed March 2026.